The fastest way to unclog a bathroom sink without chemicals is to pull the pop-up stopper out and remove the hair tangled around its base that’s the cause about 80% of the time. If the clog is deeper, work through the methods below in order: hot tap water, a pressure flush with a water bottle, a drain snake, a sink plunger, and finally unscrewing the P-trap. Most bathroom sink clogs clear in under 15 minutes with no Drano and no plumber.
Here’s the thing nobody tells you when you stand over a stopped-up sink Googling for help: most of the chemical drain cleaners sitting on the shelf at the hardware store aren’t even what plumbers reach for first. They cause problems of their own they corrode older pipes, ruin gaskets, and turn a routine fix into a hazardous mess if they don’t dissolve the clog. The good news is you almost never need them. Bathroom sink clogs are usually one specific thing (hair), in one specific spot (right under the drain), and there’s a methodical way to clear them using stuff you already own.
This guide walks through that method, step by step, from the easiest five-second fix to the slightly muckier last resort. No chemicals required.
A Couple of Things Before You Start
Don’t add anything to the drain if someone already poured a chemical cleaner in. If you inherited a sink someone else tried to “fix” with Drano or Liquid-Plumr earlier today, leave it alone for now. The standing water in that bowl is caustic, and adding vinegar, baking soda, hot water, or anything else can create a dangerous reaction. Let it sit, wear gloves, and proceed carefully.
Figure out what kind of clog you’re dealing with. Lift the stopper and run the tap for a few seconds. If water drains slowly but it drains, you’ve got a partial clog and almost all the methods below will work. If the basin fills up and stays full, the clog is complete and you’ll probably need to skip ahead to the mechanical methods (steps 3–7).
One more thing: before plunging or anything aggressive, give your drainpipes a gentle wiggle from below. If they wobble more than a couple of millimeters or feel loose where they connect, stop. Old, brittle pipes can crack under plunger pressure, and you don’t want to turn a clog into a flood.
Why We’re Skipping the Chemicals
Quick reality check on why this whole article exists: most bathroom sink clogs are hair, soap scum, toothpaste residue, and the occasional dropped earring. Chemistry doesn’t dissolve hair. The active ingredients in caustic drain cleaners sodium hydroxide, sulfuric acid, sodium hypochlorite are designed to break down organic matter, but a wad of matted hair coated in soap film resists them stubbornly. Meanwhile, those same chemicals soften plastic pipe seals, accelerate corrosion in older galvanized or cast iron lines, and create a real safety hazard for the next person who has to open up that drain. (We wrote a separate piece on why you shouldn’t pour bleach down your drains if you want the longer version.)
There’s a better way, and it’s mostly mechanical.
Method 1: The Hot Tap Water Flush
Start with the laziest possible fix because sometimes it actually works. Run the hot tap on full blast for two full minutes directly into the drain. The heat softens soap scum and toothpaste residue clinging to the inside of the pipe just past the drain opening, and the volume of water gives soft buildup a push downstream.
Important caveat about boiling water: you’ll see plenty of online guides telling you to pour a kettle of boiling water down the drain. Be cautious here. Boiling water can damage acrylic and porcelain sinks, crack natural stone basins, and warp the plastic gaskets inside modern PVC drainpipes. If you don’t know what your pipes are made of, stick to hot tap water usually around 120°F which is hot enough to soften most residue without risk.
If the water still drains slowly after this, you’ve confirmed the clog isn’t just a temporary soap-scum issue. Move to the next step.
Method 2: The Water Bottle Pressure Flush Easy And Fast
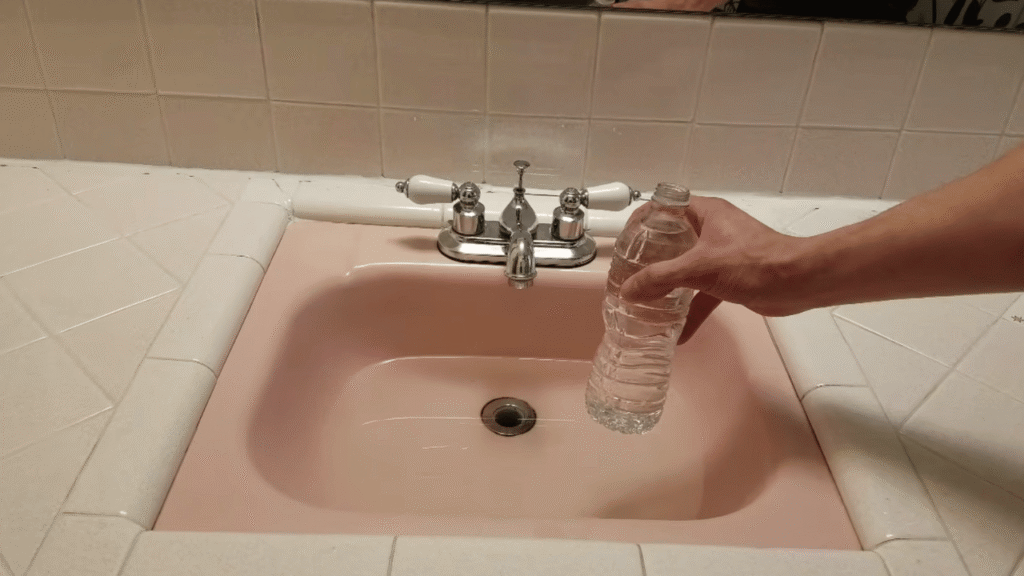
This one is genuinely underrated. Grab an empty disposable plastic water bottle the squeezable kind, not a hard-sided reusable. Fill it about three-quarters with water, leaving an airspace at the top.
Now plug the overflow hole on your sink with a wet washcloth or piece of duct tape. The overflow is that little opening near the top of the basin if you don’t block it, the pressure you’re about to create will just escape through that hole instead of pushing your clog.
Press the bottle’s mouth firmly against the drain opening to form a seal, then squeeze it as hard as you can. The trapped water shoots down under pressure and works like a small, targeted plunger. Repeat three or four times. Have a towel ready if the seal breaks, you’ll get splashback.
This works surprisingly well on soft partial clogs sitting just past the drain opening. It’s free, takes a minute, and gives you a clear yes/no answer about whether the blockage is shallow.
Method 3: Remove the Stopper and Pull the Hair Out
If the first two didn’t work, the clog is almost certainly hair wrapped around the base of your pop-up stopper or the pivot mechanism that controls it. This is the single most common bathroom sink clog and, fair warning, this is also the grossest step. It’s still the one most likely to solve your problem in five minutes.
Here’s how the pop-up stopper actually works so you know what you’re touching:
- The lift rod (the little knob behind the faucet you push or pull) connects to a horizontal pivot rod underneath the sink.
- That pivot rod runs into the back of the tailpiece the first vertical pipe section below the drain.
- A small knurled retaining nut holds the pivot rod in place. It’s textured on purpose so you can unscrew it by hand, no tools needed.
- A spring clip on the rod connects to the bottom of the stopper itself.
To remove the stopper:
- Open the cabinet under the sink and locate the tailpiece it’s the vertical pipe directly below the drain.
- Find the knurled nut where the horizontal pivot rod enters the tailpiece. Unscrew it by hand (or with pliers if a previous installer cranked it down too tight).
- Pull the pivot rod straight back. The stopper inside the sink is now free.
- Reach into the sink from above and lift the stopper out. If it’s stuck, gently work it loose with the edge of a butter knife or flathead screwdriver.
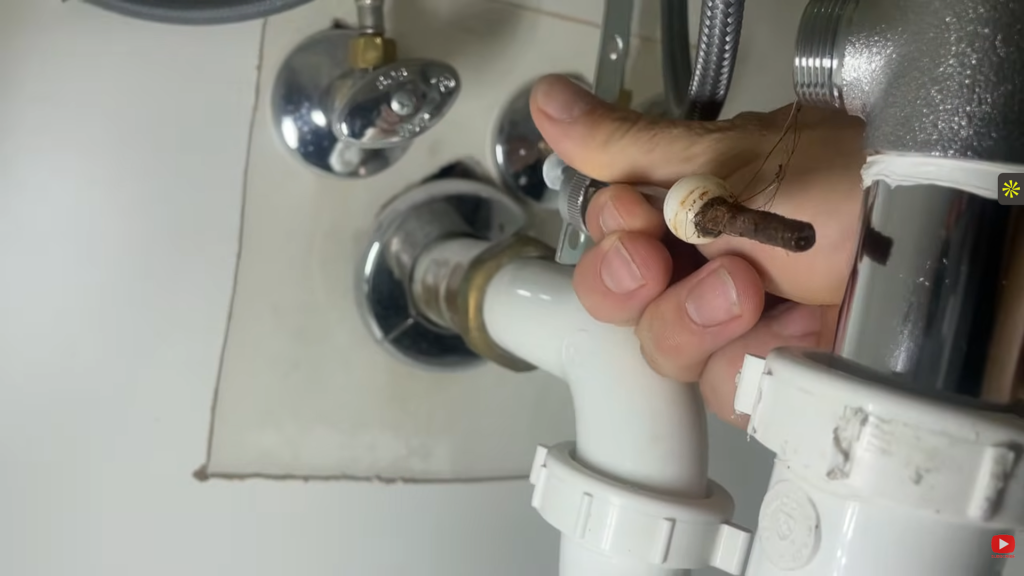
What you’ll find at the bottom of that stopper is what one plumber called “a science experiment” a wet rope of hair, soap, and minerals that has been quietly clogging your sink for months. Pull it off with a paper towel (gloves help), throw it in the trash, and rinse the stopper.
While the stopper is out, run hot water for 30 seconds and check the flow. If it’s back to normal, reinstall the stopper in reverse order and you’re done. If the drain is still slow, the clog is past the stopper move to the next step.
Method 4: Use a Hair Snake or Zip Tool
A hair snake (sometimes called a zip tool, drain stick, or barbed drain cleaner) is a thin flexible strip of plastic about two feet long with small barbs running down its length. It costs a few dollars at any hardware store, and it does exactly one thing very well: it grabs hair and yanks it back out.
Push the snake straight down into the drain opening, past the tailpiece, until you feel resistance or hit the bend of the P-trap. Twist it a quarter-turn, then slowly pull it out. The barbs will snag whatever stringy debris is in there.
You’ll probably need to do this two or three times. Each pass tends to bring up more material than you’d think a sink could hold. Once the snake comes back clean, you’ve cleared what was reachable from the top.
Hair snakes aren’t reusable in any pleasant way. Throw it out and buy a new one next time.
Method 5: Plunge It
If the snake didn’t reach far enough, a sink plunger forces water down with enough pressure to dislodge clogs further into the system. A few details that matter here:
Use a sink plunger, not a toilet plunger. A toilet plunger has a flange (the extra rubber lip that sticks out from the cup) designed to seal an oddly-shaped toilet drain. A sink plunger has a flat, wider cup that creates a good seal on a flat sink basin. They look similar but they’re not interchangeable. Also: just on a hygiene level, don’t take the one from your toilet and use it on your face-washing sink.
Block the overflow opening first. Same principle as the water bottle without blocking it, the pressure escapes sideways instead of going down the drain.
Make sure there’s enough water in the basin to fully cover the plunger cup. Plunging works by moving water, not air. You need an inch or two of standing water.
Push, don’t slam. Five or six firm, controlled push-and-pull strokes. Slamming the plunger down hard can crack older pipes or break the seal between the basin and the drain.
Repeat the cycle two or three times. If you’re going to dislodge a clog with a plunger, it’ll happen in the first couple of rounds.
Method 6: Baking Soda and Vinegar
You’ll find a thousand internet articles promising that half a cup of baking soda followed by half a cup of vinegar will dissolve any clog. The reality is more nuanced. The fizzing reaction produces a small amount of carbon dioxide gas, which can dislodge minor buildup, and the warm slightly acidic water that results can help cut through soap scum. But it doesn’t dissolve hair, and a clump of baking soda that doesn’t fully mix with the vinegar can actually make a clog worse by adding more material to it.
Here’s when it’s genuinely useful: as a monthly maintenance flush to keep your drains running smoothly, and as a deodorizer when the drain has started to smell a little funky. Here’s when it’s overhyped: as the primary fix for an already-clogged sink.
If you want to try it anyway as a final non-mechanical attempt:
- Pour a kettle of hot (not boiling) tap water down the drain.
- Pour ½ cup of baking soda directly into the drain, pushing it past the opening if you can.
- Slowly pour ½ cup of white vinegar (apple cider vinegar works too, white is preferred) on top.
- Cover the drain with a stopper or wet cloth to keep the reaction down rather than up.
- Let it sit for 15 to 30 minutes.
- Flush with another kettle of hot water.
If this doesn’t solve a fully clogged sink, move on. It’s the wrong tool for that job.
Method 7: Open the P-Trap
The P-trap is the U-shaped pipe directly under your sink. It’s there to hold a small amount of water that blocks sewer gas from coming back up into your bathroom. It’s also where pretty much every clog that survived the first six methods has gotten stuck.
This step looks intimidating, but it’s mostly a matter of patience and not minding a little gunk. You’ll need:
- A bucket or large bowl
- An adjustable wrench or channel-lock pliers (sometimes)
- Disposable gloves
- An old towel
- Your phone, for one important step at the beginning
Step-by-step:
- Clear out the cabinet under the sink and lay down the towel. This will get drippy.
- Take a photo of your pipes as they are now. Sounds silly, but when you’re trying to reassemble everything in 20 minutes, you’ll thank yourself.
- Position the bucket directly under the P-trap. There will be standing water inside it.
- Find the two slip nuts one at the top where the trap connects to the tailpiece (the pipe coming down from the sink), and one at the side where it connects to the wall pipe. These nuts are supposed to be installed hand-tight, but plumbers and previous homeowners almost always crank them with a wrench, so don’t be surprised if you need pliers.
- Loosen both nuts. Water will start dripping immediately that’s expected.
- Pull the P-trap free and dump its contents into the bucket. The blockage is usually visible right inside the curve.
- Clean the inside of the trap with a bottle brush or paper towels. Rinse it out in the bucket if needed.
- Check the wall pipe by shining a flashlight in. If you see more buildup past the trap, push a snake in a few feet and twist.
- Reassemble in reverse. Make sure any rubber gaskets are seated properly (the thinner edge points away from the pipe joint). Tighten the slip nuts by hand first, then snug them with the wrench but don’t overtighten or you’ll crack the plastic threads.
- Run water for a minute and check for leaks under the trap. If you see drips, tighten the slip nuts another quarter turn.
When you can run the tap at full pressure with no slowdown and no leak under the cabinet, you’ve fixed it.
When to Stop and Call a Plumber
There are a few situations where DIY stops being the right answer, no matter how stubborn you are:
- Multiple drains in the house are slow. This points to a main line issue, not a sink problem. The fix is downstream of anything you can reach.
- Sewage smell coming from the drain. That suggests the P-trap has dried out or the vent system has an issue — different problem than a clog.
- The clog returns within a few days of being cleared. That usually means buildup further down the line, not just at the sink.
- You’ve removed the P-trap and pushed a snake into the wall pipe and still hit blockage. Beyond that point you need a longer drain machine and probably a camera inspection.
- Anything you took apart is leaking after reassembly and you can’t get it to stop. Sometimes a slip nut or washer gets damaged and just needs to be replaced easy if you’ve got a parts bin, frustrating if you don’t.
A pro can usually clear a sink drain in under an hour with the right equipment, and for older homes in the Dallas–Fort Worth area especially many of which still have original cast iron or galvanized lines getting a camera in there at least once can save a lot of guesswork.
How to Keep It From Happening Again
Once your sink is flowing, a couple of easy habits keep it that way:
- Install a $5 hair catcher over the drain. The mesh or silicone kind catches hair before it goes down. Empty it once a week into the trash. This single change prevents probably 80% of future clogs.
- Run hot tap water for a full minute after brushing teeth or shaving. It pushes residue past the trap before it has a chance to stick.
- Use enzyme-based drain treatments once a month. Products like Bio-Clean or Green Gobbler use live bacteria to digest organic buildup. They’re safe for septic systems, won’t damage pipes, and they actually work on the kind of grime that chemical cleaners overpromise on. The U.S. EPA also has good general guidance on protecting septic systems and household drains if you’re on septic.
- Never pour grease, paint, or coffee grounds down the bathroom sink. Obvious, but worth saying.
Frequently Asked Questions
Why is my bathroom sink clogged with no obvious cause?
Most of the time it’s hair, even if you don’t see any. Hair from washing, shaving, and grooming tangles around the pop-up stopper and slowly traps soap scum and toothpaste residue. The clog builds up gradually over months until water flow finally drops noticeably.
Can I unclog a bathroom sink without removing anything?
Sometimes a water bottle pressure flush, a sink plunger, or a long hair snake can clear shallow clogs without disassembly. But if the blockage is past the stopper, you’ll usually need to remove the stopper or the P-trap to fully clear it.
Is it safe to pour boiling water down a bathroom sink?
Not always. Boiling water can damage acrylic sinks, crack natural stone, and warp the plastic gaskets inside modern PVC drainpipes. Hot tap water around 120°F is safer and almost always sufficient. Reserve boiling water for old metal-pipe drains, and even then pour carefully.
Does baking soda and vinegar really unclog a sink?
It can help with very minor buildup and works well as a monthly maintenance flush, but it doesn’t reliably clear actual clogs — especially hair clogs. Mechanical methods (plunger, snake, P-trap removal) are far more effective on real blockages.
Why shouldn’t I just use Drano?
Caustic drain cleaners can damage older pipes and gaskets, corrode the metal parts in your stopper assembly, and create a serious safety hazard for whoever has to disassemble the drain next. They also struggle with hair clogs, which are the most common kind. Even professional plumbers usually treat them as a last resort. Verify any plumber you hire is licensed through the Texas State Board of Plumbing Examiners before they work on your home.
How long does it take to unclog a bathroom sink?
Most clogs clear in 5 to 15 minutes once you identify the cause. Pulling hair from the pop-up stopper takes about five minutes. P-trap disassembly is usually 20 to 30 minutes including reassembly.
What if my sink is fully blocked and won’t drain at all?
Skip straight to the mechanical methods. The water-bottle pressure flush, a plunger, a hair snake, or P-trap removal all work on fully blocked sinks. Avoid pouring any liquid (hot water, vinegar, anything) into a basin that won’t drain — it just creates a soup you’ll have to bail out later.
Do I need a special plunger for a bathroom sink?
Use a sink plunger (also called a cup plunger), not a toilet plunger. A sink plunger has a flat, wide rubber cup that seals against a flat sink basin. A toilet plunger has a folding flange designed for a toilet’s curved drain. They’re not interchangeable.
My sink is clogged but the toilet flushes fine does that matter?
Yes, it tells you the clog is in the sink’s branch line, not the main sewer. That’s good news — it means the fix is local and almost always DIY-able.
How often should I clean my bathroom sink drain?
A monthly enzyme treatment plus a weekly hot water flush is enough for most homes. If you have long hair in the house, consider pulling the pop-up stopper every two or three months for a preventive cleaning.
Can a clogged sink cause damage if I leave it?
Eventually, yes. Standing water can corrode the metal parts of the stopper and pivot rod, and slow drainage allows more residue to build up further down the pipe. A slow drain today is a fully blocked drain in a month or two.